Sewage Cleanup Steps in New Jersey
PDQ Fire & Water Damage Restoration is your trusted, locally owned partner in New Jersey for emergency sewage cleanup. When raw sewage backs up into your home or business, it's more than just a mess—it’s a serious health hazard. Our certified team is trained to handle the most hazardous bio-contaminants quickly and safely, restoring your property and peace of mind.
We stand behind our work with a 100% satisfaction guarantee and an industry-leading 29-minute average response time. From start to finish, we make a stressful situation easier by managing the entire cleanup and disinfection process—and even dealing with your insurance company directly. Skip the red tape and get the job done right. Call PDQ today for immediate, no-hassle service at 973-447-3363 or click here to make an appointment!
Step by Step Guide to Sewage Cleanup
- Safety First!!
- Wear PPE (Personal Protective Equipment) such as waterproof Tyvek suits, nitrile gloves, googles, respirator, rubber boots. This is Cat 3 water and is contaminated.
- Contain the Sewage to the Affected Area
- Seal off air ducts to minimize the spread of airborne contaminants. Close and seal off doors to the unaffected areas. Place protective floor coverings on unaffected areas you will need to walk through, so as to minimize the tracking of sewage and water though the property.
- Identify the Cause and Document It
- Identify what caused the sewage backup. Very commonly it maybe a soft clog near your clean out, such as a wad of toilet paper. Call a professional to help with the clog or repair. Take pictures of the clog if you are considering putting in an insurance claim and save their bill.
- Remove Contents
- Move out all your contents so that you can then work on the structure. Take the “unaffected contents” and move to a different room, move the affected nonporous contents to another area so they can be cleaned and deodorized.
- PRO Tip: Bag the affected contents in your garage so you can photograph each item, if you are putting in an insurance claim. Do NOT throw them out yet, your adjuster may want to inspect. Wait for approval before you discard them. Get this in writing.
- Move out all your contents so that you can then work on the structure. Take the “unaffected contents” and move to a different room, move the affected nonporous contents to another area so they can be cleaned and deodorized.
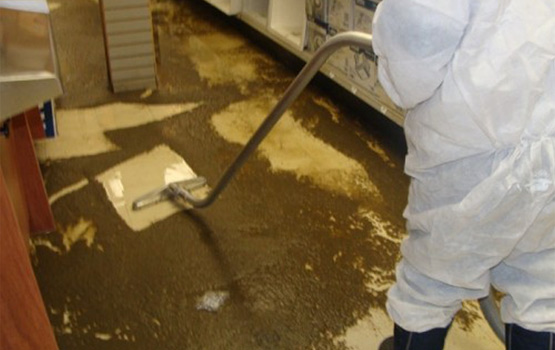
- Remove the Sludge
- Use a shovel and scrape as much as you can off the floor and double bag and tie/seal them off. Do not make them too heavy so they may rip open. Any surface that was in contact with the sewage must be sanitized. Sewage backups often leave behind sludge and debris that should never be cleared by hand. Instead, use a shovel to get it off the floor and into heavy-duty plastic bags.
- Remove Affected Building Materials
- Remove affected flooring such as carpet, pad tack strip, vinyl floors, wood floors and sometimes tile floors if the sewage soaked into the grout lines.
- Any paneling, drywall, plaster, insulation will need to be removed if affected.
- PRO Tip: Save a 1’ x 1’ piece of any of your floor such as carpet, pad, laminate floor, wood floor, or tile… your adjuster may need to send out for replacement pricing evaluation.
- Extract Any Standing Water
- Remove dirty water, this may take 2 or 3 passes. Make sure a grounded outlet is being used. The contaminated water should only be dumped into a toilet.
- Scrub and Rise the Affected Area
- Use a low-sudsing detergent and an odor inhibitor mixture and scrub down all surfaces affected by sewage backup. Basement floors, walls and steps need to be washed with hot water and rinsed with clear, hot water. You might need to do this a few times. Extract the remaining water from the floor. Make sure to get under the sill plates.
- Sanitize All Surfaces
- After all areas have been thoroughly cleaned of sewage, you will want to apply a disinfectant and an antimicrobial to those areas. Make sure to get under the sill plates.
- Drying Process
- Once all the demolition, cleaning and sanitizing are done, you will want to set up your drying equipment. The proper number of dehumidifiers, air scrubbers and air movers will need to be set up for the drying to take place. Depending on the building materials and how long they were wet, it may take several days or longer to completely dry out the property.
- Clean Yourself Up
- It is recommended to throw out the clothes your wore and cleaning rags so that you don’t cross contaminate your laundry with sewage. Wash your hands thoroughly and take a hot shower with an antimicrobial soap.